Frequently Asked Questions

-
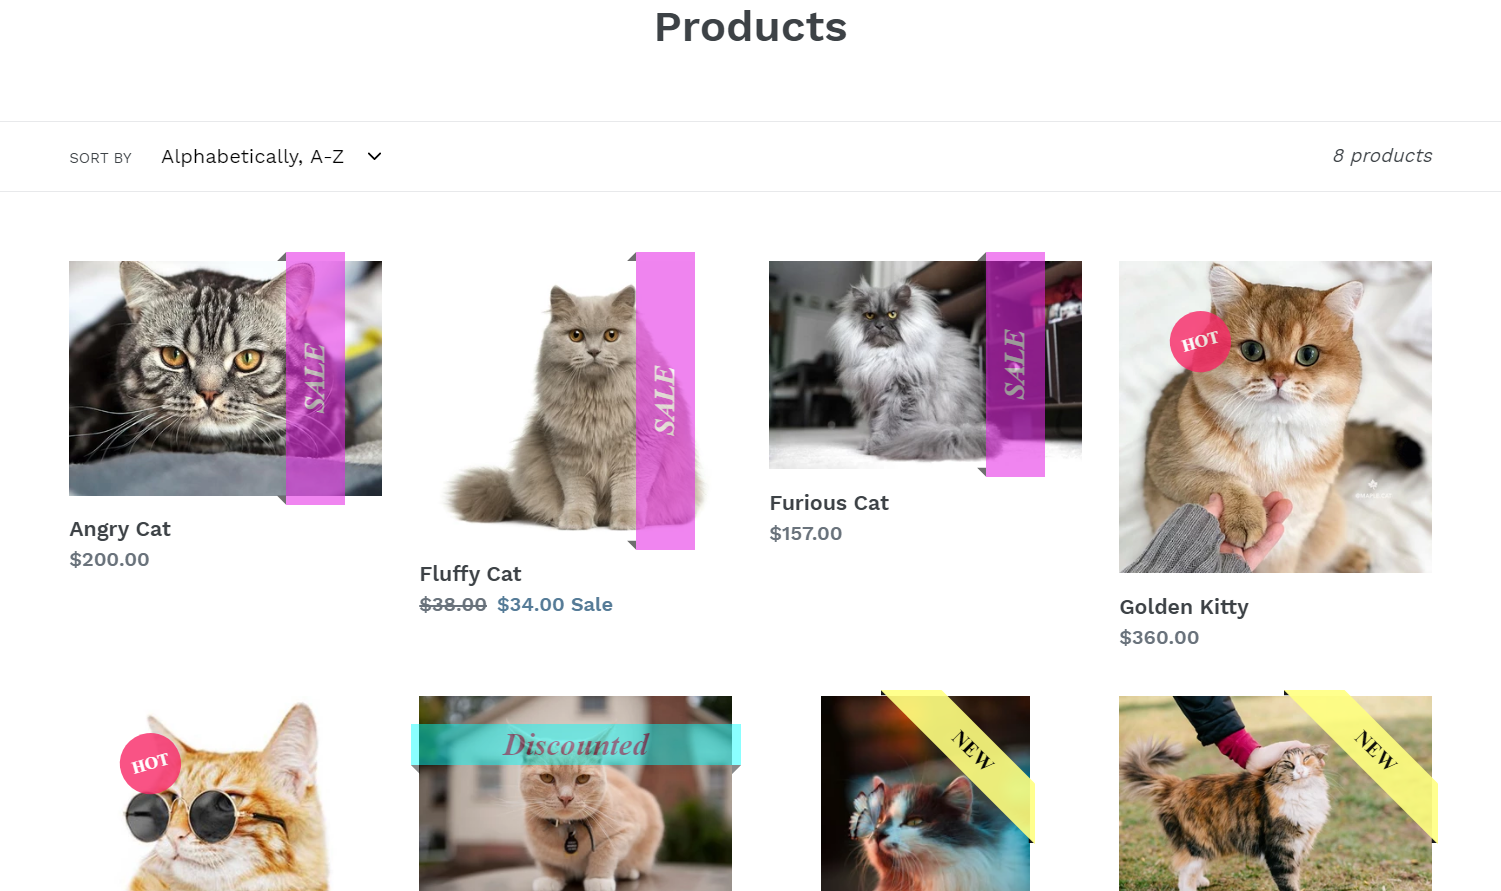
1. What does this app do and how does it work?The app is an advanced and easy-to-use label editor for your product images. It will allow you to add highly configurable labels badges, corner, vertical and horizontal ribbons to your products. It works as follows - you can configure a specific label, apply it to all products/specific products/specific collections and the label will show on the front end images of the respective products.
-
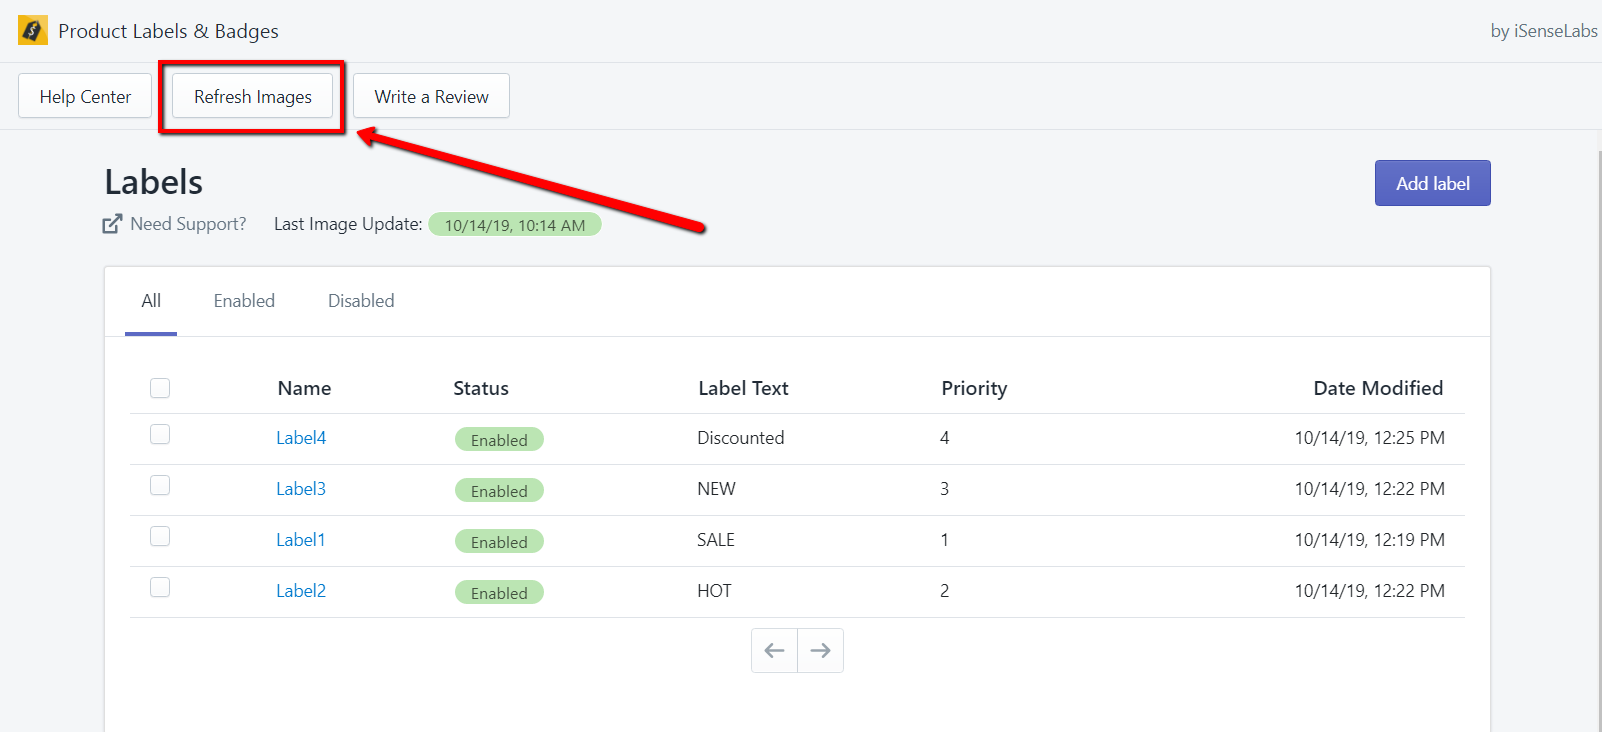
2. Are there any additional steps that I should do after I install the app?Prior to starting with the creation of the labels, please click the "Refresh images" button on the Dashboard page. This button will prepare the product images for the label addition.
-
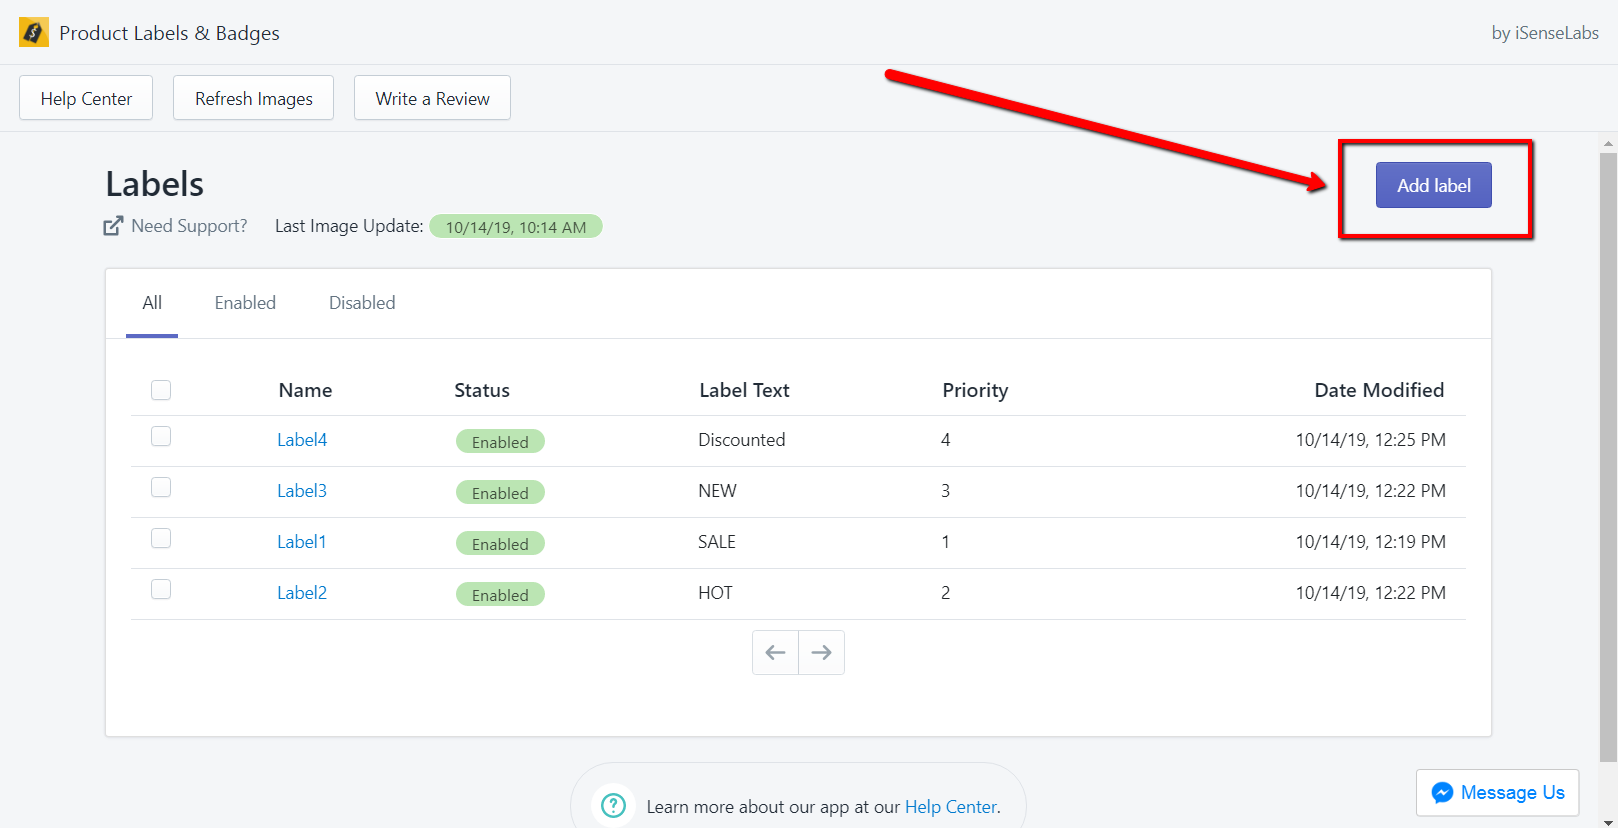
3. How to create a label?You will need to navigate to the "Dashboard" and then click on the "Add label" button. A page will be displayed, where you will see detailed instructions about each field.

-
4. How many labels can I create?You can make an unlimited number of labels. Currently, there are no limitations to that.
-
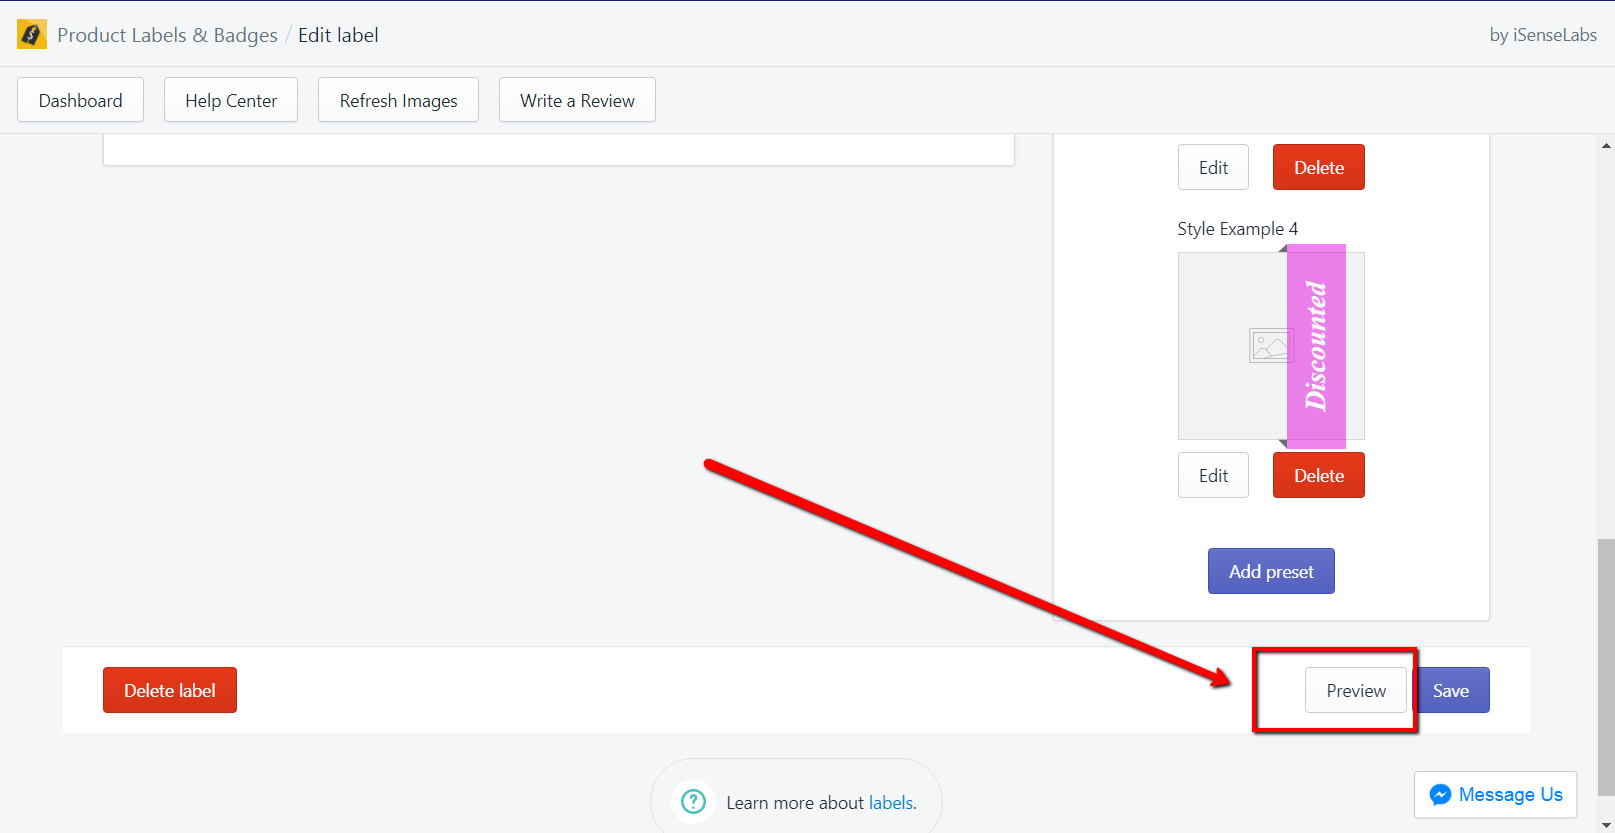
5. How can I make tests with my label?Each label has a preview button, located right next to the Save button. When clicked, it will show how the label will be applied to the product image.

-
6. What does the "Refresh Images" button do?The button makes all the available product images ready to get a label attached to. It will modify the images alt option in the format of Product_Name (Product_ID).
NOTE: This will not impact negatively the SEO ranking, on the contrary, it will boost it. If you have setup a label and later on add new images to your products, you should click this button to apply the label to the new images as well.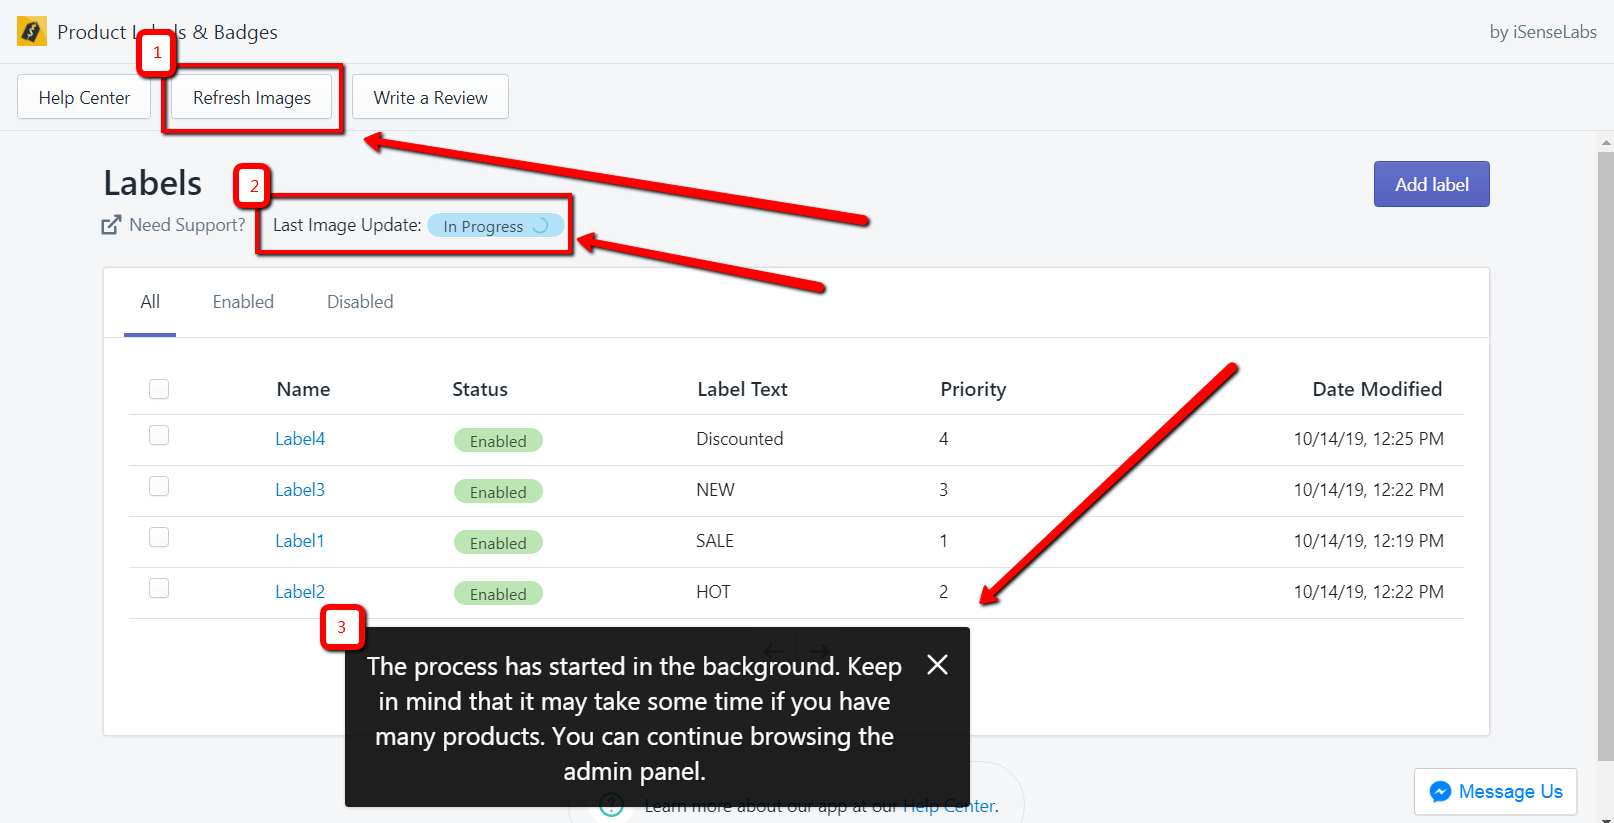
-
7. Can I set different labels for the same product?Yes, however only one label will be applied at a time - the one with the highest priority.
-
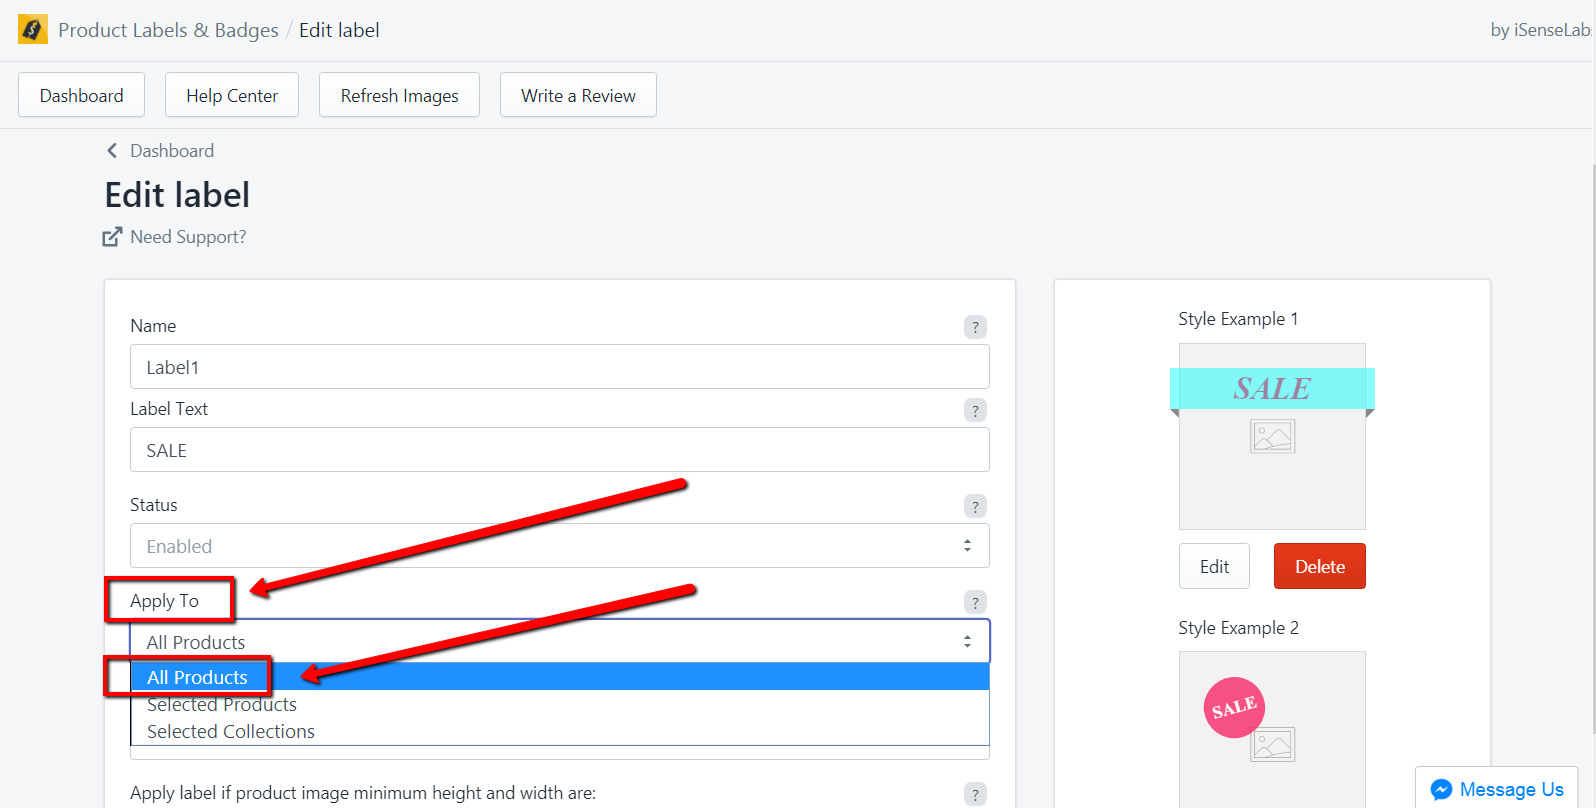
8. Can I apply a label for all the products?You can set a label to be applied to all of the products, by selecting the option All products in the Apply To option.
-
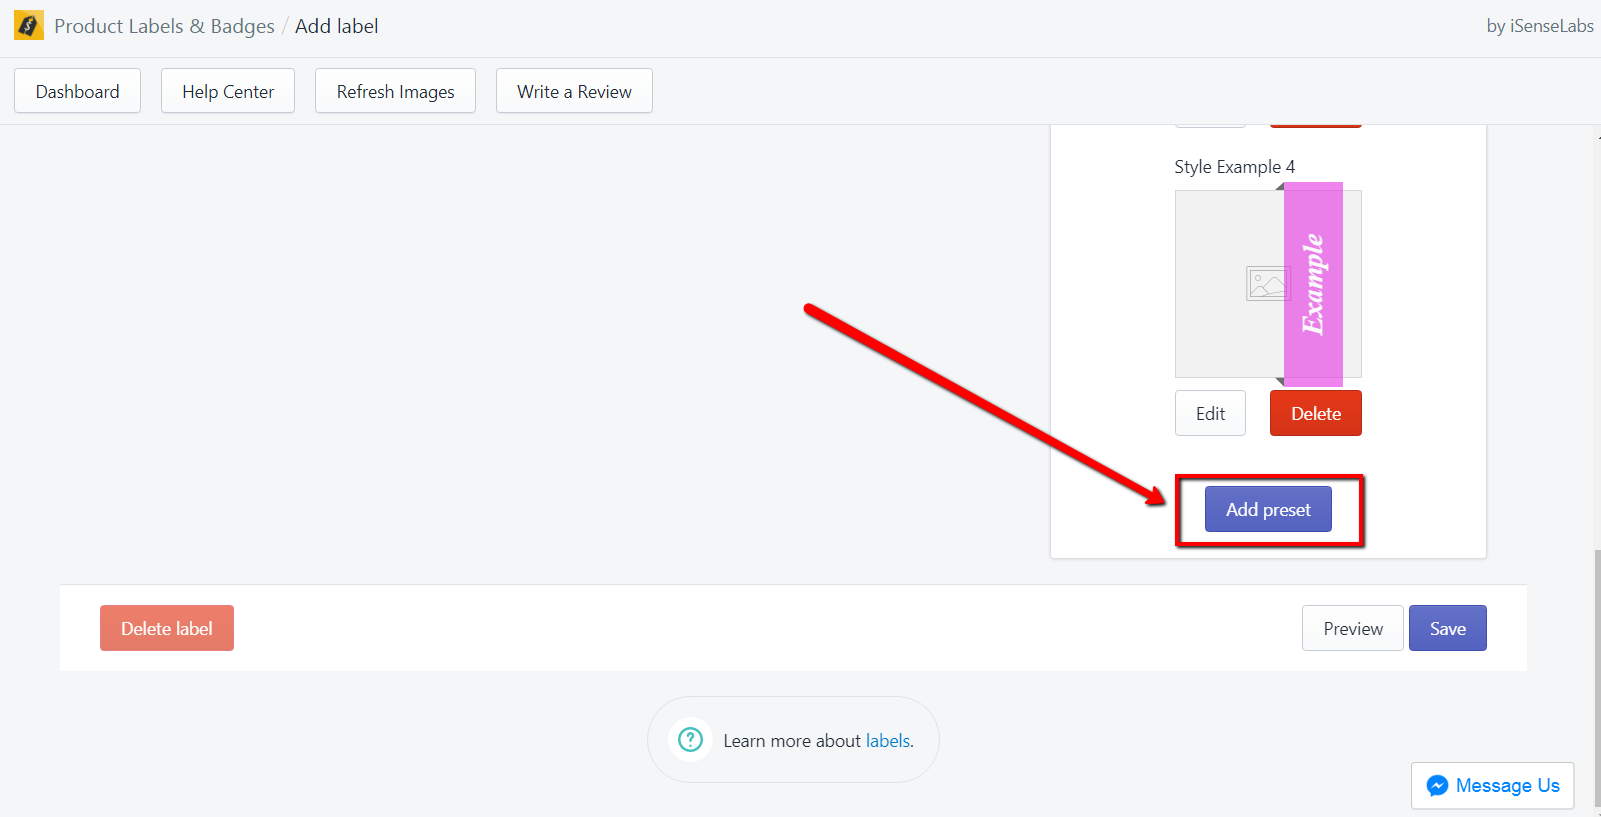
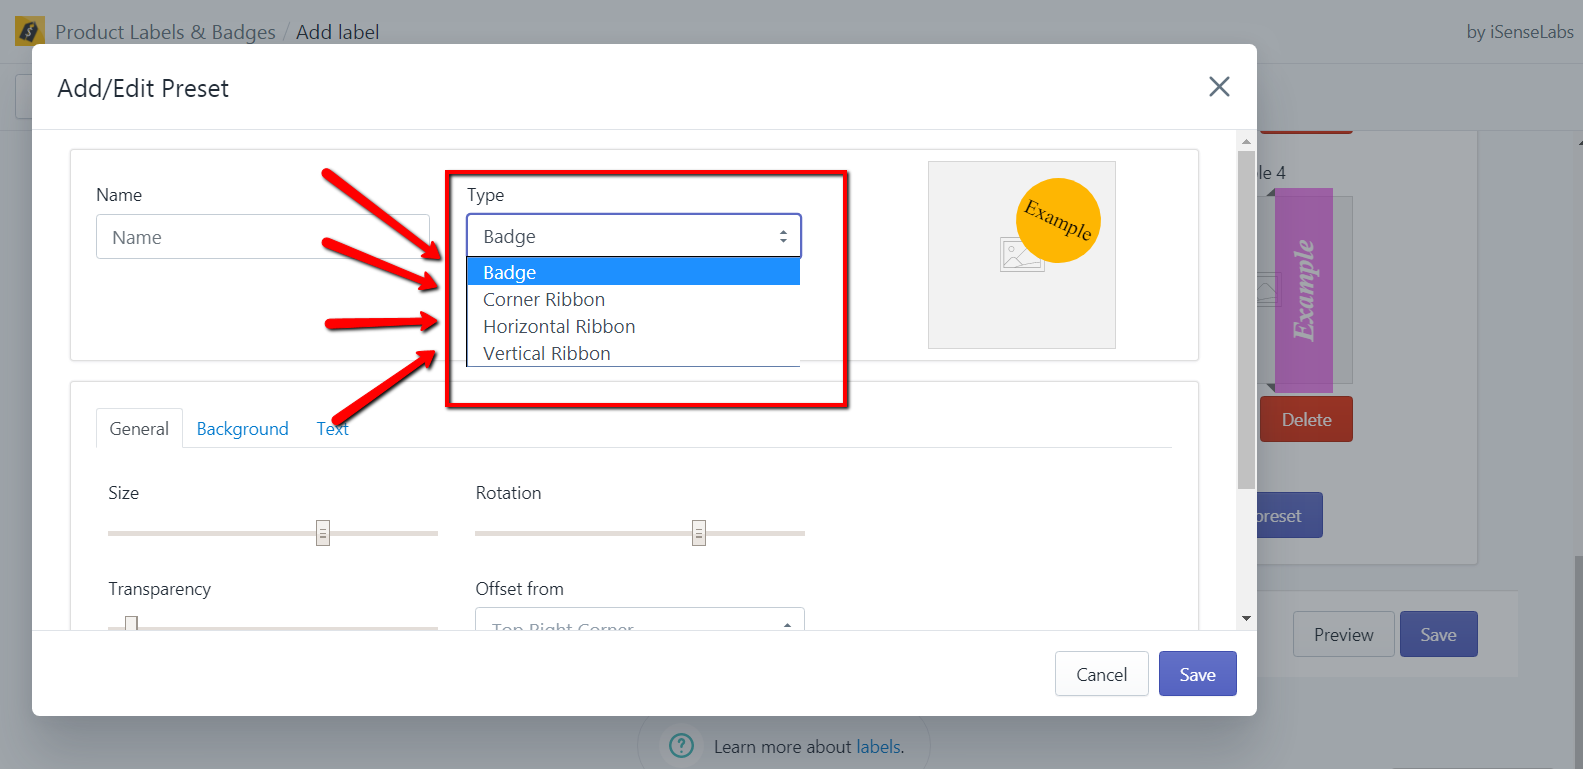
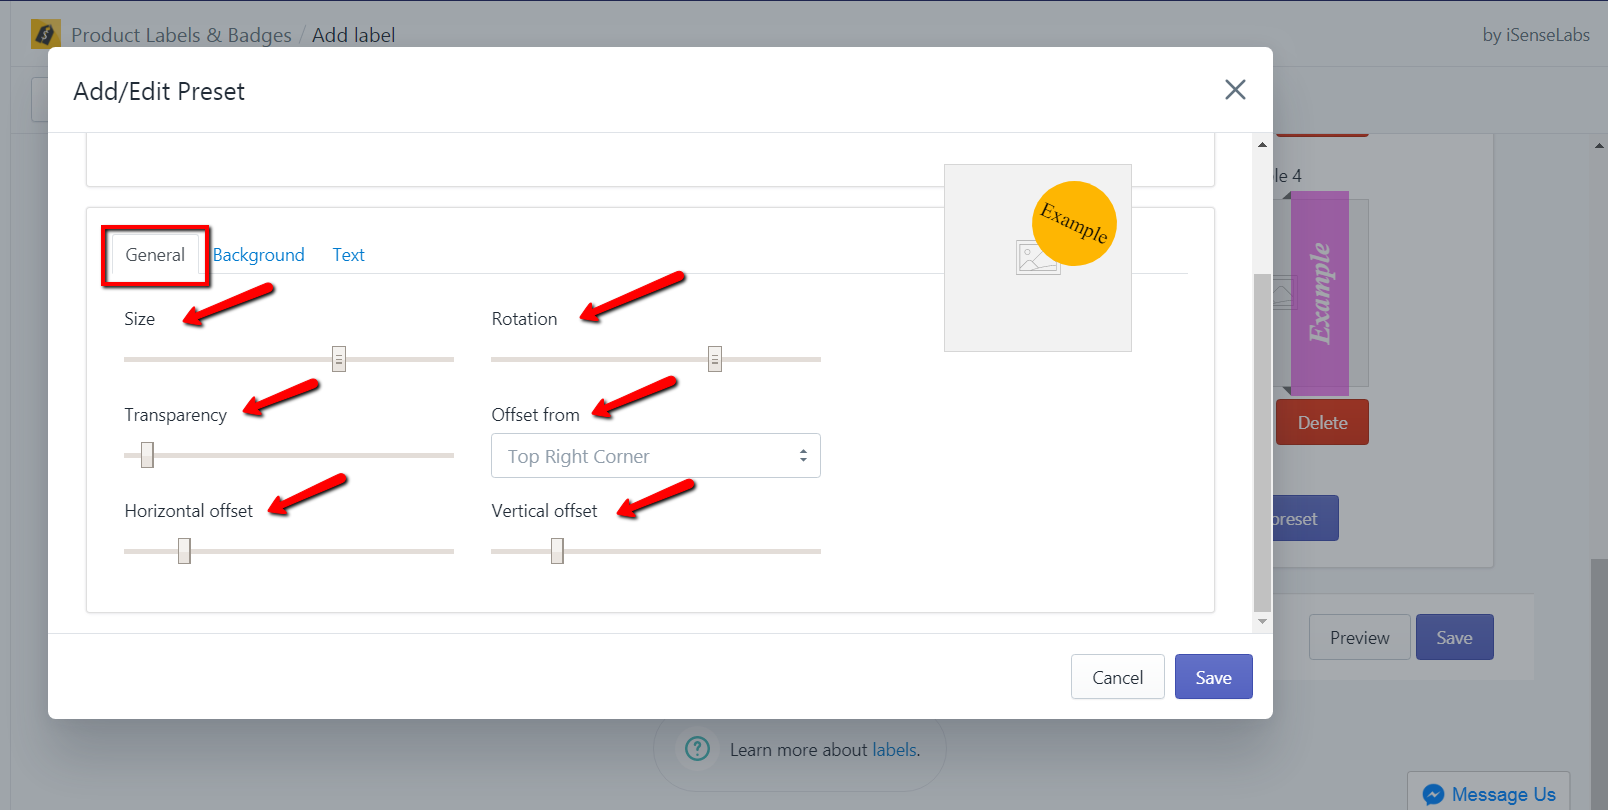
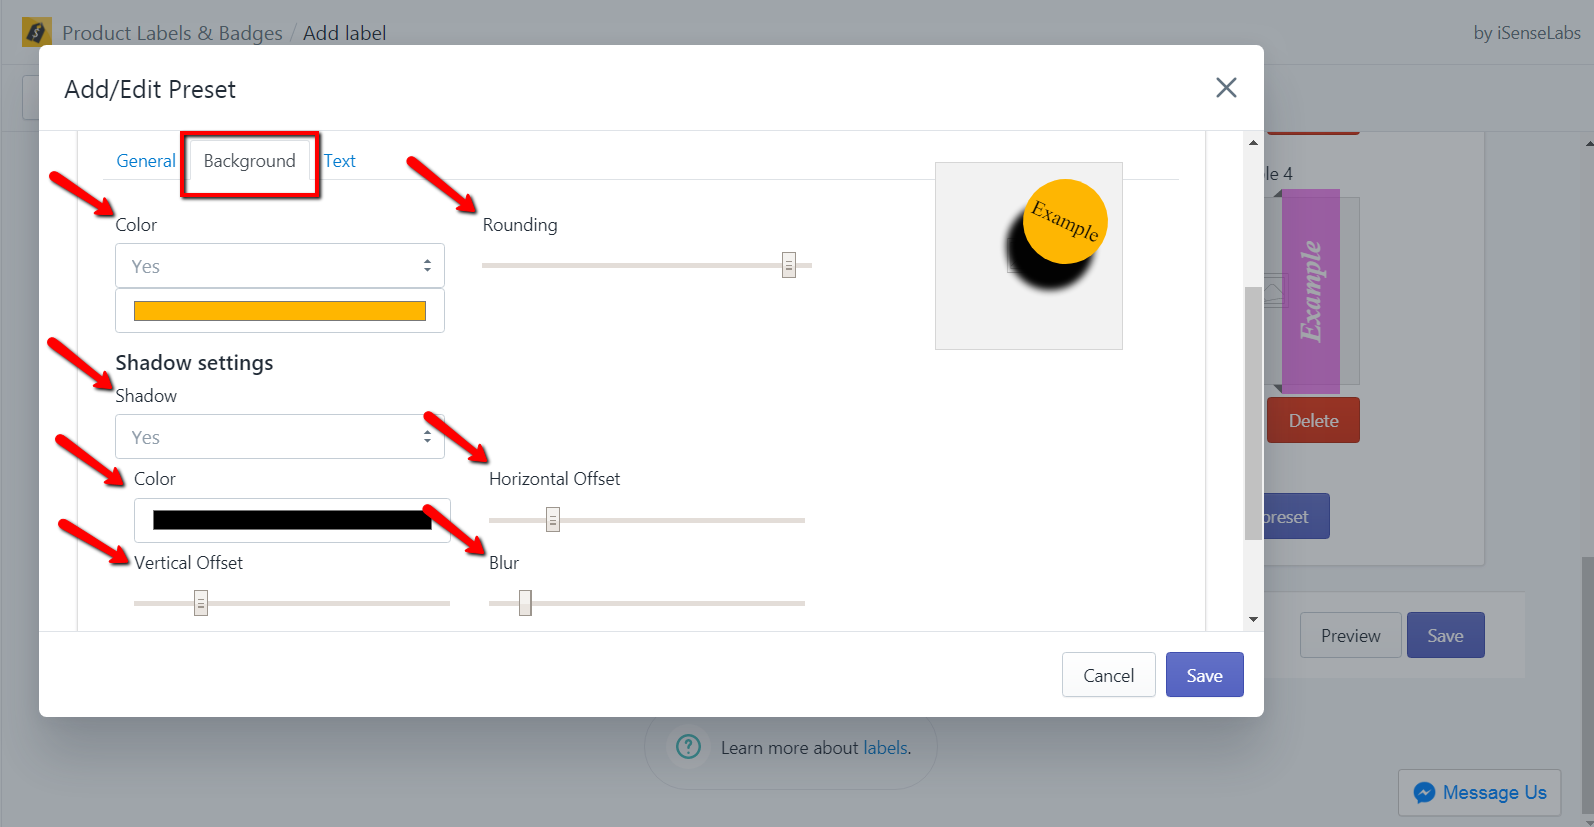
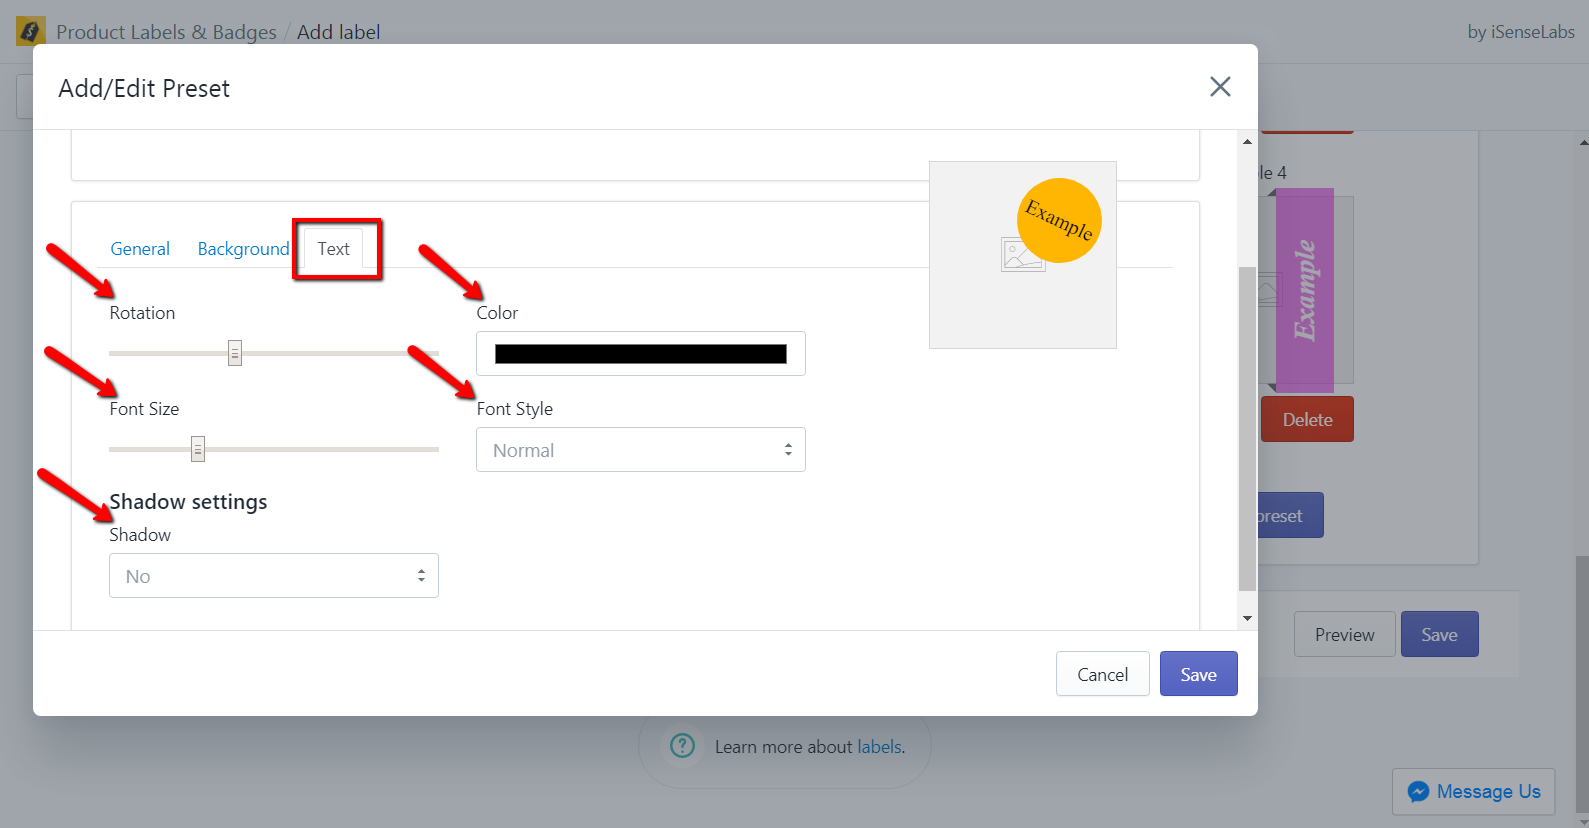
9. How to use the "Add preset" feature?The Presets are lable templates that are set in advance so you could easily apply them when needed. The module comes with four example presets which can be used as they are or you can also edit them. Click on the "Add preset" button to add a new preset label. A popup will show with different options featuring a preview section which will be updated instantly on each change applied to the settings. The features are grouped in four sections:
The main section which allows you to add a Name for the label preset and choose the type. Note that the name is simply an identifier of the preset, not the label name itself. The available types are four: Badge, Corner Ribbon, Horizontal Ribbon, Vertical Ribbon.
General: Here you can set the size of the label, the rotation, transparency, and offsets (from/horizontal/vertical).
Background: Here the settings of the label background are specified. You can set a color to the label, rounding, set a shadow. For the shadow settings such as color, horizontal/vertical offset, blur and size can be set.
Text: For the text in the label you can specify the rotation, the color, font-size, font-family, and the text shadow setting such as color, horizontal/vertical offsets and blur.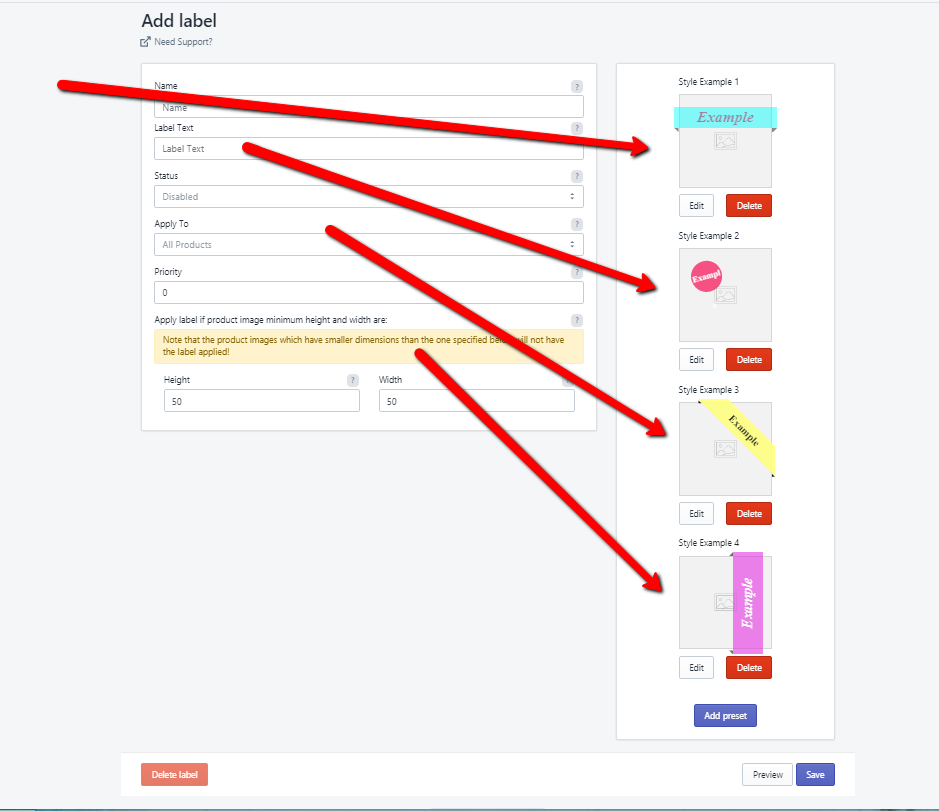
-
10. What control do I have on the content of a label?The "Add preset" feature is where you can create the content of a label. You can specify a name and choose the type (Badge/Corner Ribbon/Horizontal Ribbon/Vertical Ribbon).
For each of the presets you can specify settings such as size, horizontal offset, offset form and transparency. For the background of the preset you can choose to use a color, to add shadow in a specific color and configure the wrap. For the shadow you can set the color, horizontal/vertical offset, blur, size. The same for the wrap, you can specify the color, the orientation and the size.
The label text can be also configured, by setting a text color, alignment options, font-size, shadow and setting for the shadow.
NOTE: Check the screenshots in the previous question for more details. -
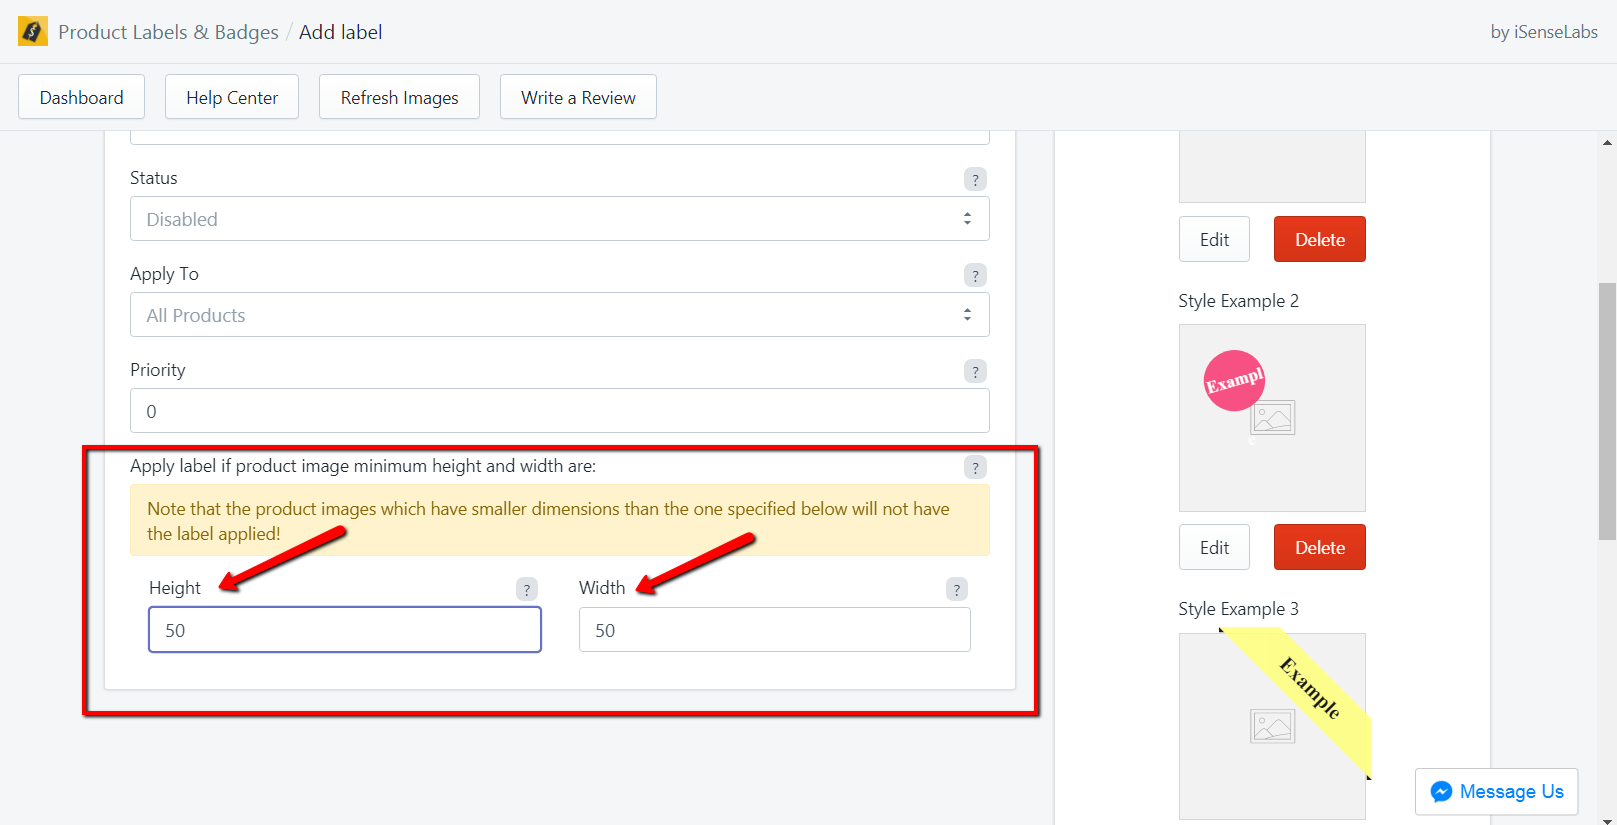
11. I created a label. Can I choose the images size to which it should be applied?You can set the minimum height and width of the product images to wich the lable will be applied. This can be configured from the settings "Apply label if product image minimum height and width are:"
-
12. The label is shown on the product page, but not in catalog listing pageThis is most probably due to the configuration of the label. Please check the size of the product images in the catalog page and make sure that it is bigger than the minimum product image height and width you have configured in the app settings in Label [Edit] > Apply label if product image minimum height and width are: Height, Width
NOTE: Check the screenshots in the question above for more details. -
13. I see a Priority option, how does it work?If two labels are assigned to the same product, the label which has the highest priority will be applied to the product on the front end. In other words, if we have two labels which are set to be applied to Product X, let's say we have Label A with a priority of 1 and Label B with a priority of 2. The label with priority 2 will be applied to the respective Product X.
If you have the following situation:
One lable assigned to All Products with priority level 1 and another lable assign to a specific product with the same priority levle of 1, the lable that will get assigned to the product is the one that is applied for All Products.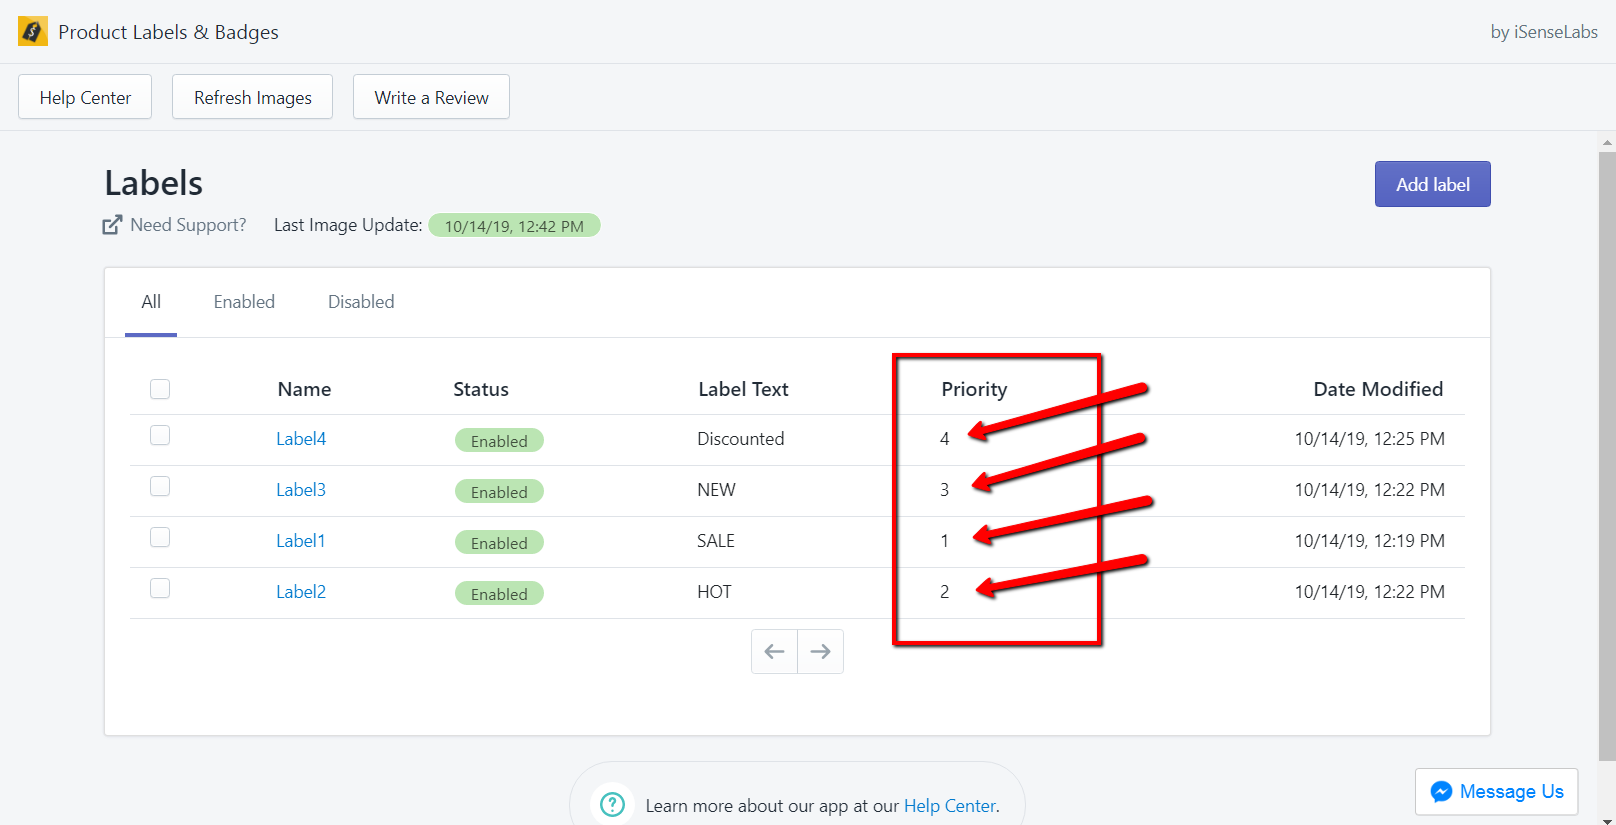
-
14. What if I have the same products in different collections?If you have the same products in two different collection pages and you add a label to only one of these collections, this label will appear in all products, in spite of the collection they are listed under.
In other words, if one product exists in two different collections and only one of these collections has a label added to it, this same product will appear with a label in all cases.
This is happening due to the fact that the labels are being applied directly to the products. When we have a product that is present in two or more collection pages we are not able to avoid the label overlay. -
15. I created a label but I don't see it in the store front. Why?There are a couple of reasons for this to happen:
- Make sure that the status of the label is set to "Enabled".
- Check the "Last Image Update" field on the Dashboard page. If it says "In Progress", it means that your images are not processed yet.
- An SEO app is conflicting with our app. If you have an SEO app that is adding ALT tag to your images, this may be the reason why the labels are not visible. Make sure to disable that feature, and then click on the "Refresh Images" button in our app.
- Missing ALT tags on your product images. On some themes, the developers did not add ALT tags to the product images. This is necessary for the label to be applied correctly. This can be resolved by either the theme developers or by us. Feel free to contact us so we can confirm if that is the case. You can use this Chrome extension to see if your images have ALT tags.
One last thing: If you are using a custom or a highly-modified theme, there might be some small issues. Feel free to reach our support team - they will check it for you. -
16. How to manage the advanced "Apply To" statuses?The new statuses that we have added to the "Apply To" field are: New Products and Out Of Stock Products.
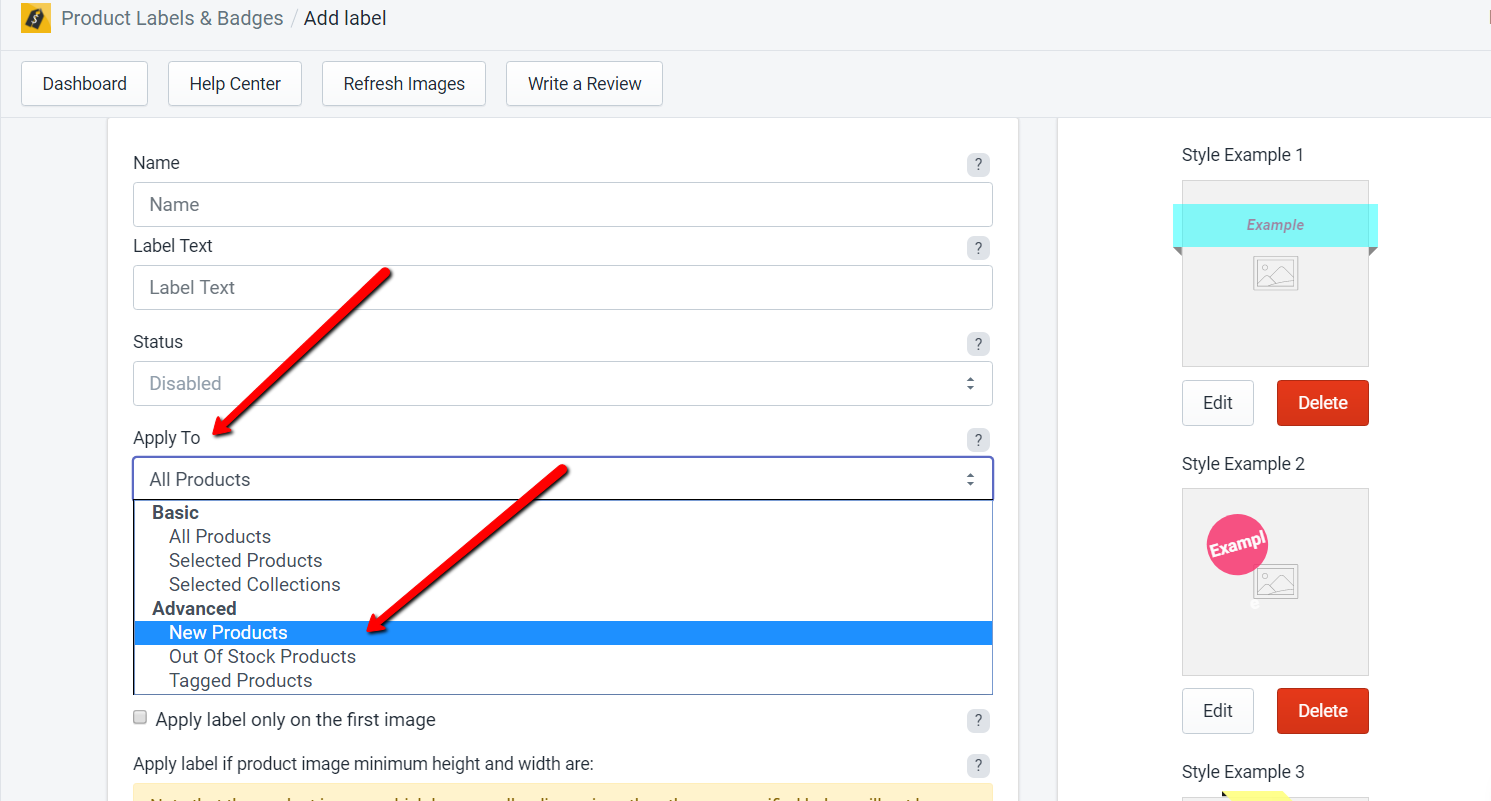
The "New Products" status will add a label only to the products that were added within a given period of time in the near past. In order to manage this, upon selecting this option, you will see a filed called: "Time (in days)". If, for example, you enter 10 as a number in this filed, this means that all of the products added within the last 10 days will have this label applied to them.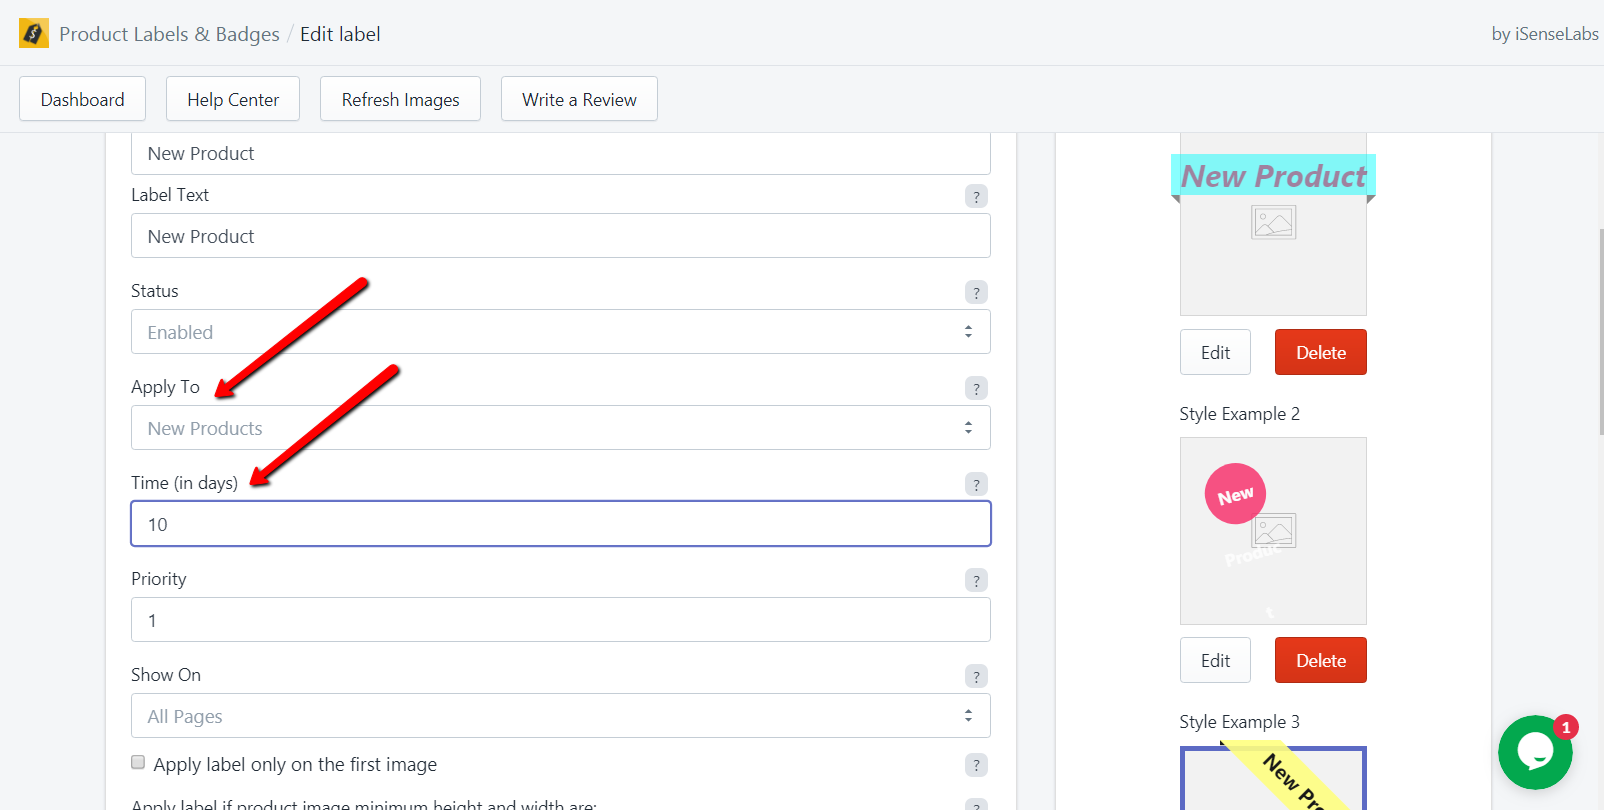
The "Out Of Stock" status, is pretty self-explanatory, nevertheless, if you have a product that has available quantity of 0, this label will be applied to it directly.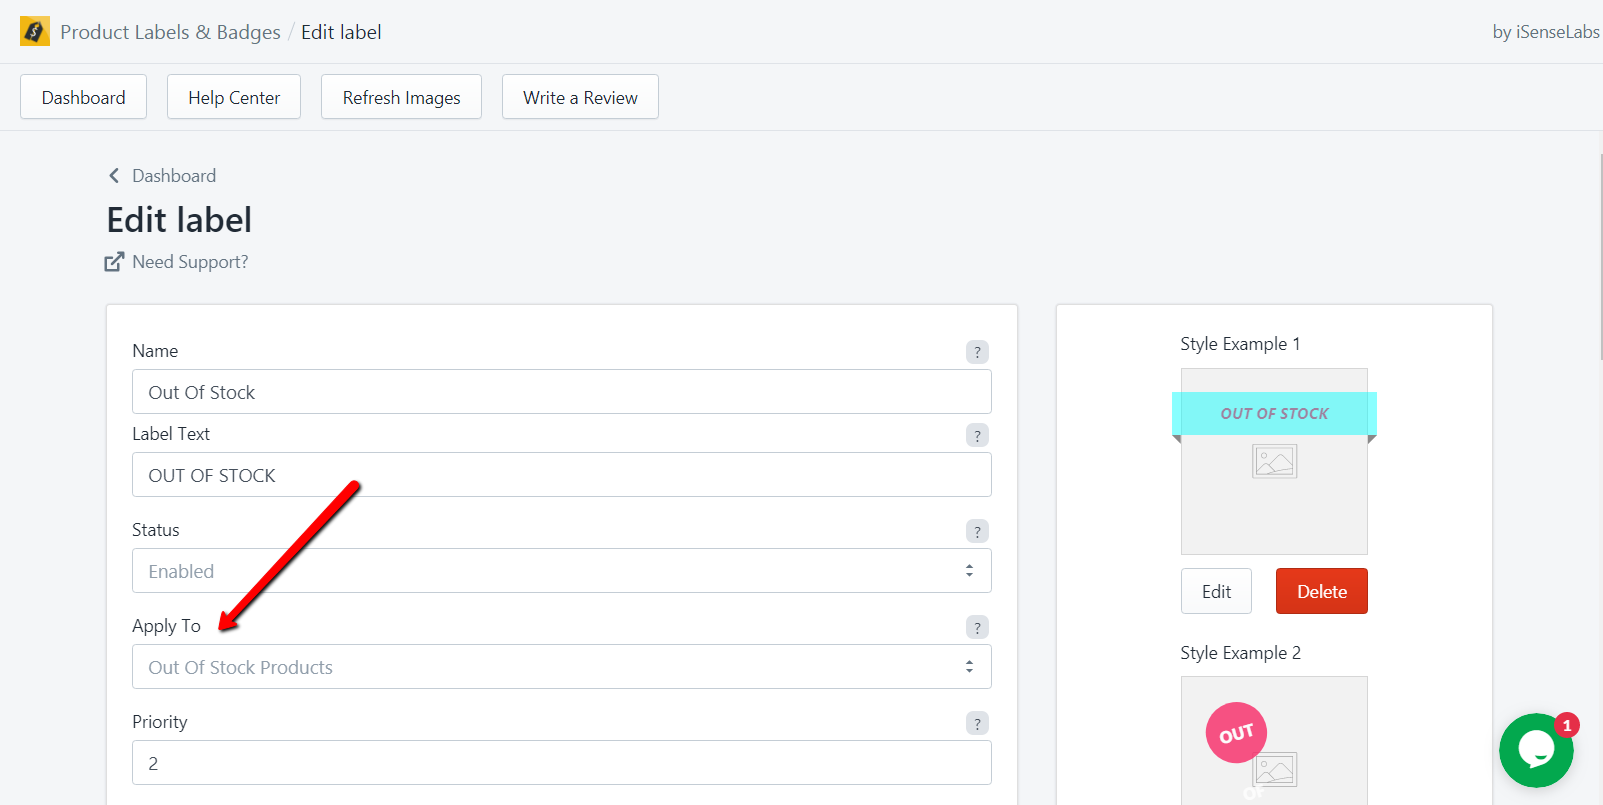
Important Notice: Please make sure that the priority of these statuses is not overlapping especially when used at the same time and for the same products. For instance, if I want to put a label called "New Arrival" on a product that is new by using the "New Product" status and put another label on the same product with the "Out of Stock" status, so once the product quantity hits 0 the label would change to "This product is no longer available", then our advise here would be to put a priority 1 to the "New Product" status label and priority 2 to the "Out of Stock" status label.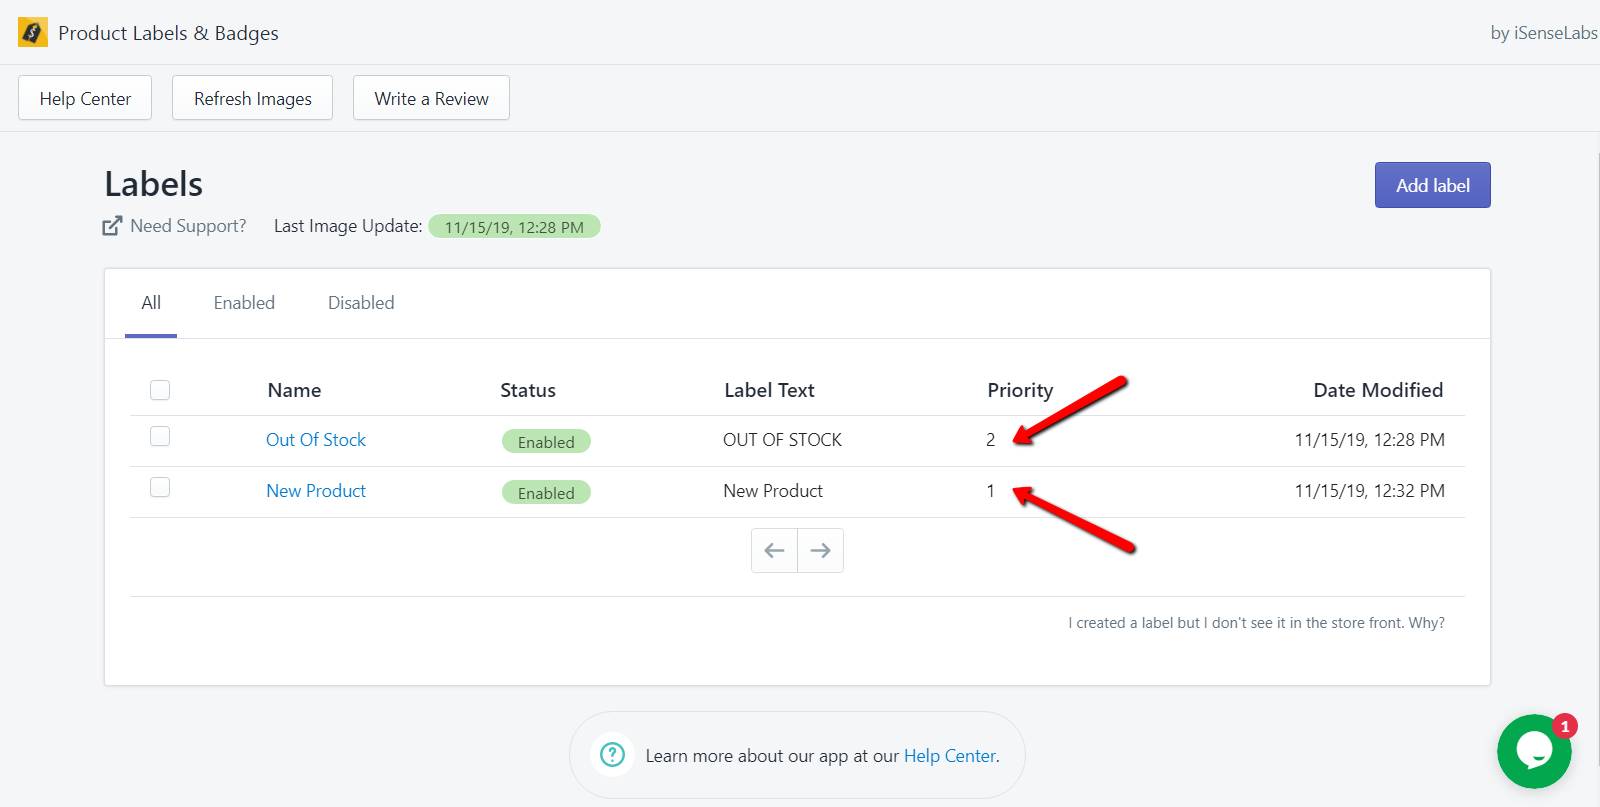
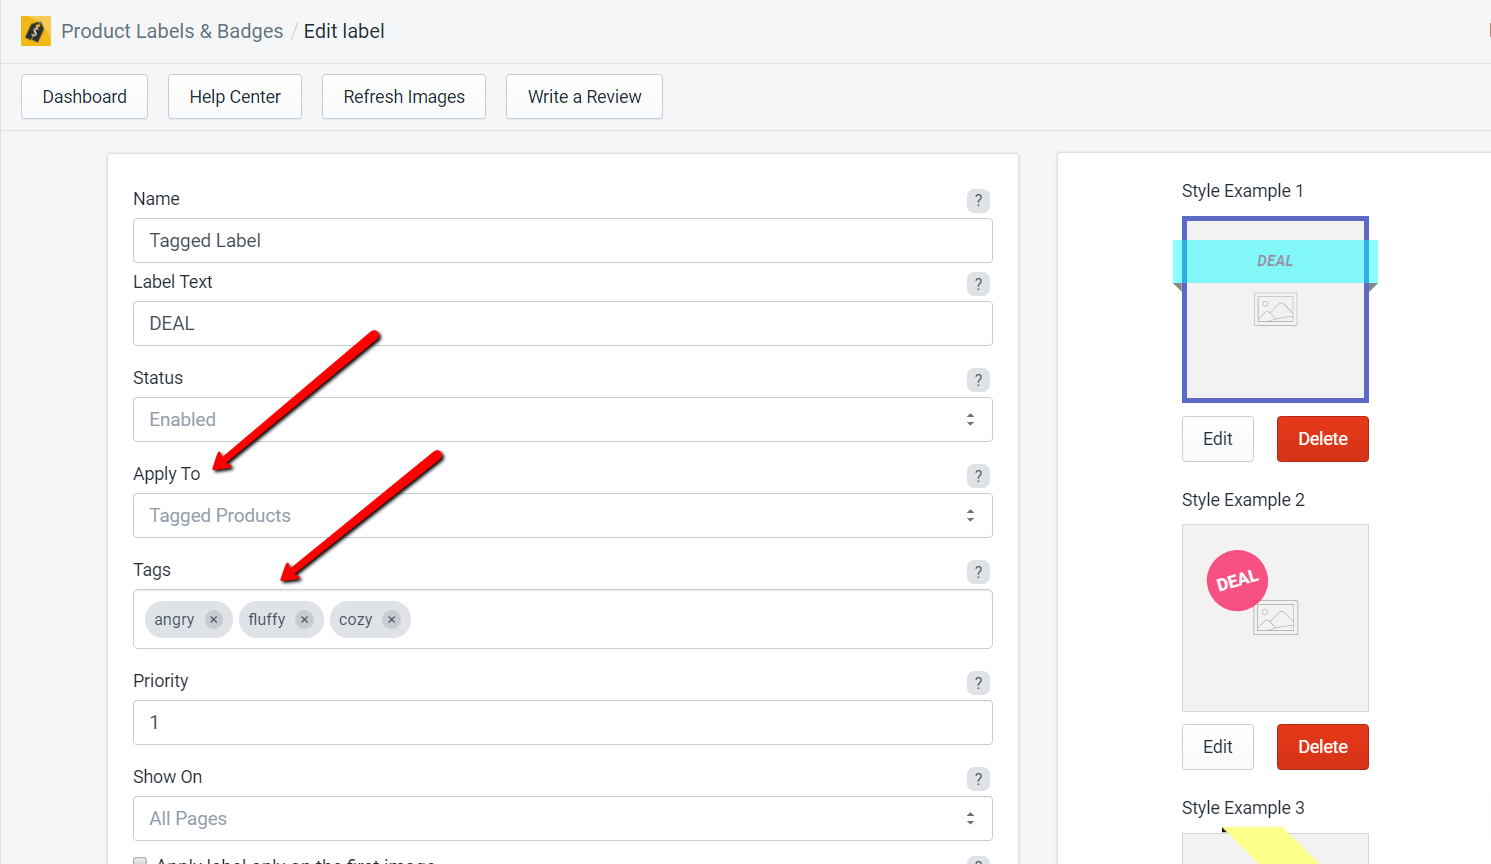
The "Tagged Products" status will add a label only to the products that were added/created with specific tags (in Product Edit). In the additional filed that will open after selecting this status, you will be able to list the respective tags as shown in the below screenshot.
-
17. What is the difference between a label and a preset?The Preset section in the app shows a set of pre-defined label design settings. If you are feeling too lazy to customize your own label and you already see a Preset choice that will suit your needs (perhaps with a little color twist) you can take advantage of the Label Preset List available in each "Add label" screen. You can also add some custom designs if you want in order to have them available each time when you are making a new label. This will facilitate your work and make your promotion labels come even faster to your customers.
Our app comes with five predefined presets that will give you the foundation to create a label right after you install the module. Basically, you can create a Label from scratch without using the presets, if you are really looking for a custom and unique outlook. However, we have added these presets, just so you have a convenient and fast way of creating a label with choosing a ready design and work on top of it.
Regarding the difference itself - The label is the end product that you are going to show on your storefront attached to your product images. A preset is a label variation (design setting) that you can use during the creation process when building a Label. -
18. I changed my theme. Should I make some adjustments to the app as well?The app has no relation to the theme that you use, so you can switch to as many themes as you want. In addition to that, our product does not make any changes to your themes, so there will be no need for you to transfer any codes or data from your old theme to your new theme.
The only thing that you would probably have to check is if the theme that you are using has included ALT tags for the product images. If this is not done, the labels will not be visible. There are two ways you can approach this:
- Ask the theme developers to include them for you - they are aware of the code they've written for you and it should be a relatively easy task.
- We can do it for you - keep in mind that this might take some time as we have to get acquainted with the theme first.
-
19. Can I upload images to the labels?Yes, but only as a Badge Label. In order to upload an image instead of using the default labels, you need to go to the Dashboard, click on the Add Label button and then scroll all the way down to the Add preset button. In the Add/Edit Preset popup, first you will need to remove the color for the default badge image as shown below
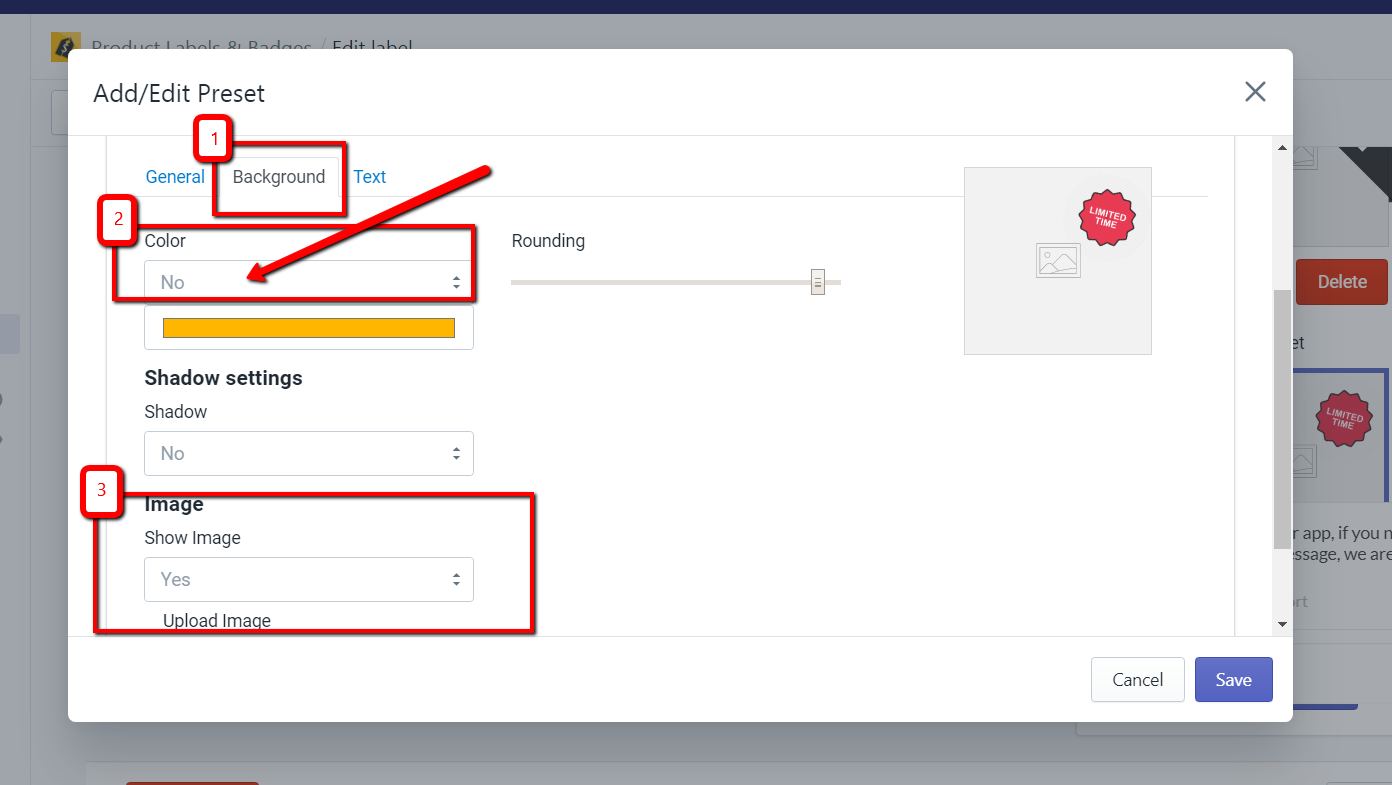
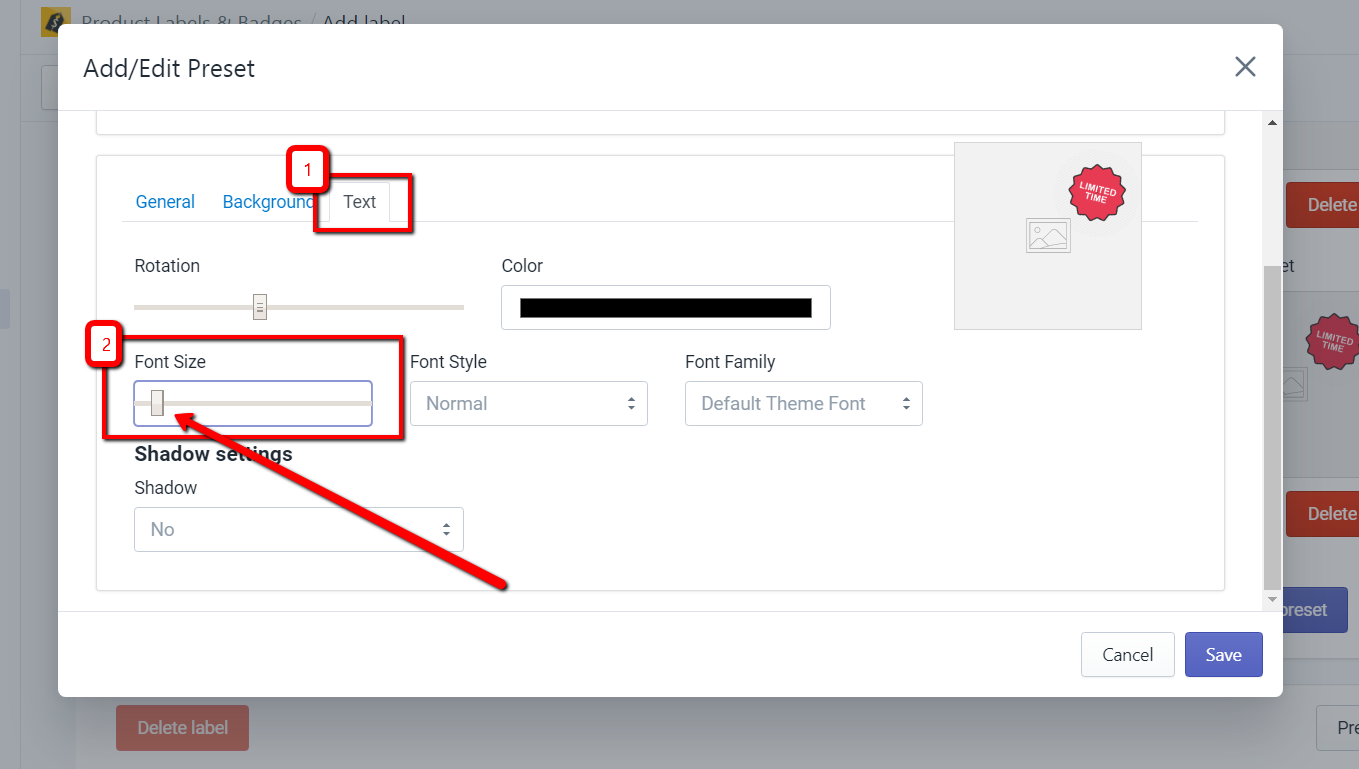
Then you can upload the image. If you are using a badge with predefined text on it, you won't be needing the text functionality of the preset, so in order to disable that you will need to go to the Text tab and slide the Font Size slider to the minimum as shown below:
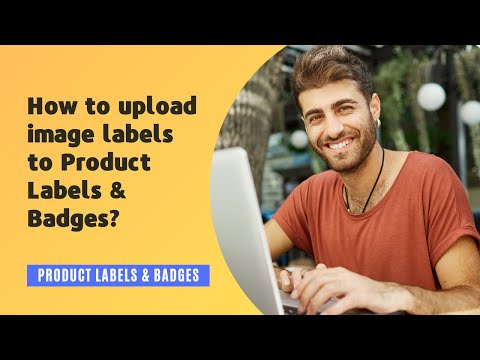
In the video below, you will see a step-by-step explanation on how to create the preset and then add it to show on a specific product.
-
20. How to create discount labels for discounted products in "Product Labels & Badges" for Shopify?Before starting with the configuration, you need to make sure that the products you want to put discount labels on are set up with their discounted price correctly. Once this is confirmed, you can go ahead and create your discount labels. First, you need to select the shape and create the design of the preset. Once this is done, you need to complete all of the fields in the Add Label page. In the Label Text field you should put the discount you want to have visible on the front end of your store, for example: "-10%", "10% OFF", "$10 OFF" etc. After you save the settings you will be able to see how the label looks like on your selected product image. For a step-by-step example, please check the below video:
Note: If the text is too long you may need to adjust the Font Size from the Preset Design settings.

-
21. How can I cancel the recurring payments?The recurring payments are canceled automatically once you uninstall the app.
-
22. When will a charge occur after the Free Trial ends?Once the trial is over, the app charge is issued, then invoiced monthly with all the other app and subscription charges. Merchants can see the breakdown of app charges all under one bill - the Shopify invoice. More information about this you will be able to find here: https://help.shopify.com/en/manual/your-account/manage-billing/your-invoice/apps
-
23. How to remove the preset text from the label?If you are uploading an image label that has a ready text you most probably don't won't to use the preset text option in the label settings. In order to remove the default text and show only your custom label you will need to go to the Text tab and reduce the Font size to minimum as shown in this video:
-
24. I have a feedback/suggestion for the appGreat! We would love to hear what you want to say. You can contact us directly from the "Message Us" button at the bottom right corner of your browser.
-
25. I don't see my question here. How can I contact you?You can contact us directly from the "Message Us" button at the bottom right corner of your browser.
-
26. I want to uninstall your app. What are the steps that I have to go through?We are sorry to hear that you want to uninstall our app. We would appreciate it if you contact us in regards to what you are missing or if you have any suggestions/complaints.
Still, if you are confident about your decision and there is nothing we can do to change your mind, you can simply go to Shopify Admin -> Apps and then uninstall our app. This is all that is needed, and there is nothing else that is required from your side. If you are on a paid plan, it will be canceled automatically. -
27. How to activate the Product Labels & Badges to load via app embed block?
With the new changes that Shopify has introduced with Online Store 2.0, they suggest that the apps that are currently using a ScriptTag API to load their scripts, to now use theme app extensions, and the file that was loaded before to be hosted and loaded now directly from Shopify's CDN network.
In order to activate this, here are the steps that you would need to follow:- Navigate to Online Store -> Themes
- Press the Customize button of your current live theme
- Navigate to Theme settings in the bottom left corner
- Click App embeds
- Locate the Product Labels & Badges and turn on the app embed.
- Save the settings
- That's it!